|


 Facebook#1(調査)
| 外部サイト |
|
|


HOME > CoreTextでTextViewの一文字の向きを変える(#2)
CoreTextでTextViewの一文字の向きを変える(#2)
前回の記事では向きを変える方法を失敗してしまいましたので、 今回は気持ちを切り替えて再調査。ルビをふるCoretextのサンプルがqiitaで紹介されていましたので、 そのサンプルを利用させて頂きトライしてみます
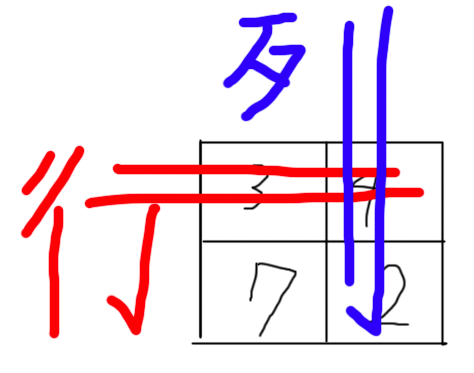
さて、サンプルそのままだと面白くないので、本日6月から開始する自転車規制強化 にのっかったサンプル<自転車の転だけ横に曲げる>にしてみます。(14歳以上が対象。自転車のイヤホン装着や片手走行、 酔っ払い運転、歩道運転、片手スマホ、、、、今まで誰もがやり通してきたことが「逮捕や補導の対象」となるようです。赤切符もきられる ようになるとのことで、自転車に酔っ払ってのって自動車の免停なんかになりかね無いので注意です)
15歳は対象なので、高校生の子供がおられる家庭は気をつけた方がよさそうです。知ら無い間に5万の罰金する必要が、、、 なんて事が多発するのでは、、、知らなかったではすまされ無い事になりそう
参考:ルビを振る
参考:「スマホ利用」「イヤホンで音楽」もNG? 今日から道交法の自転車規制が強化
参考:自転車ダイエッターは要注意!6月から規制強化だって
やってみた
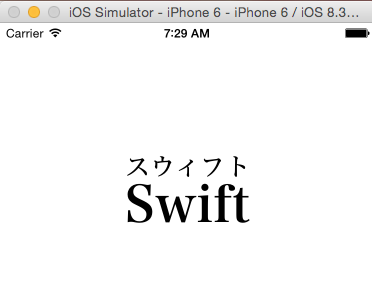
さて、まずはそのまま貼り付けてみて。SwiftサラリーマンのSwiftにスウィフトのルビをつけられるかトライしてみます。 UIViewのdrawRectでテキストを描画されています。
import CoreText
import UIKit

class View: UIView {
    override func drawRect(rect: CGRect) {
        let string = "Swift"
        let ruby = "スウィフト"

        var text = [.passRetained(ruby) as Unmanaged?, .None, .None, .None]
        let annotation = CTRubyAnnotationCreate(.Auto, .Auto, 0.5, &text)

        let attributed = NSAttributedString(string: string, attributes: [
            NSFontAttributeName: UIFont(name: "HiraMinProN-W6", size: 50.0)!,
            NSForegroundColorAttributeName: UIColor(red: 0, green: 0, blue: 0, alpha: 1.0),
            kCTRubyAnnotationAttributeName: annotation.takeUnretainedValue(),
            ])

        let size = attributed.boundingRectWithSize(
            CGSizeMake(rect.width, rect.width),
            options: .UsesLineFragmentOrigin,
            context: nil)

        let context = UIGraphicsGetCurrentContext()

        CGContextSetRGBFillColor(context, 1, 1, 1, 1.0)
        CGContextAddRect(context, rect)
        CGContextFillPath(context)

        CGContextTranslateCTM(context, (rect.width - size.width) / 2.0, 200.0)
        CGContextScaleCTM(context, 1.0, -1.0)

        let line = CTLineCreateWithAttributedString(attributed)
        CTLineDraw(line, context)
    }
}

class ViewController: UIViewController {
    override func loadView() {
        super.loadView()

        self.view = View()
    }
} で、できました。woxtuさんのコードを参考にさせてもらっています
このwoxtuさんのサンプルには縦書きのcoretextサンプルもありましたので、それも利用すると以下のように。
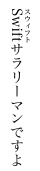
これであれば、、、自転車の「転」だけを横にすることもできそうな気がしてきました。継続してみます
import CoreText
import UIKit

extension String {
    func find(#pattern: String) -> NSTextCheckingResult? {
        let re = NSRegularExpression(pattern: pattern, options: .allZeros, error: nil)!
        return re.firstMatchInString(self, options: nil, range: NSMakeRange(0, count(self.utf16)))
    }

    func replace(#pattern: String, template: String) -> String {
        let re = NSRegularExpression(pattern: pattern, options: .allZeros, error: nil)!
        return re.stringByReplacingMatchesInString(
            self,
            options: .ReportProgress,
            range: NSMakeRange(0, count(self.utf16)),
            withTemplate: template);
    }
}

class View: UIView {
    override func drawRect(rect: CGRect) {

        let text = "自|転《横変換》車";

        let attributed =
        text
            .replace(pattern: "(|.+?《.+?》)", template: ",$1,")
            .componentsSeparatedByString(",")
            .map { x -> NSAttributedString in
                if let pair = x.find(pattern: "|(.+?)《(.+?)》") {
                    let string = (x as NSString).substringWithRange(pair.rangeAtIndex(1))
                    return NSAttributedString(
                        string: string,
                        attributes: [NSVerticalGlyphFormAttributeName: true])
                } else {
                    return NSAttributedString(
                        string: x,
                        attributes: [NSVerticalGlyphFormAttributeName: false])
                }
            }
            .reduce(NSMutableAttributedString()) { $0.appendAttributedString($1); return $0 }

        let size = attributed.boundingRectWithSize(
            CGSizeMake(rect.width, rect.width),
            options: .UsesLineFragmentOrigin,
            context: nil)

        let context = UIGraphicsGetCurrentContext()

        CGContextSetRGBFillColor(context, 1, 1, 1, 1.0)
        CGContextAddRect(context, rect)
        CGContextFillPath(context)

        CGContextTranslateCTM(context, (rect.width - size.width) / 2.0, 200.0)
        CGContextScaleCTM(context, 1.0, -1.0)

        let line = CTLineCreateWithAttributedString(attributed)
        CTLineDraw(line, context)
    }
}

class ViewController: UIViewController {
    override func loadView() {
        super.loadView()

        self.view = View()
    }
}
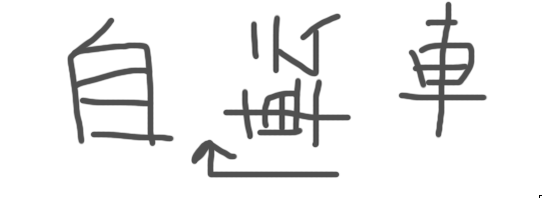
それとなくできました。画像小さい、、、、。map関数あたりが正直よくわかっていないので、 不要な部分だらけです..... ただ、転だけを横にすることはできました。文字の位置がずれてしまうんですね、、、、 このあたりも調整する必要がありそうです。もっと削ぎ落とす場所が多いので修正していまいります。
追記(上記ソースコードを整理しました)
上記mapの箇所を調整してスッキリしました(2015/6/1 午後)
import CoreText
import UIKit

class View: UIView {
    override func drawRect(rect: CGRect) {

        var attributed:NSMutableAttributedString = NSMutableAttributedString();
        attributed.appendAttributedString(NSAttributedString(string:"自",attributes: [NSVerticalGlyphFormAttributeName: false]));
        attributed.appendAttributedString(NSAttributedString(string:"転",attributes: [NSVerticalGlyphFormAttributeName: true]));
        attributed.appendAttributedString(NSAttributedString(string:"車",attributes: [NSVerticalGlyphFormAttributeName: false]));

        let size = attributed.boundingRectWithSize(
            CGSizeMake(rect.width, rect.width),
            options: .UsesLineFragmentOrigin,
            context: nil)

        let context = UIGraphicsGetCurrentContext()

        CGContextSetRGBFillColor(context, 1, 1, 1, 1.0)
        CGContextAddRect(context, rect)
        CGContextFillPath(context)

        CGContextTranslateCTM(context, (rect.width - size.width) / 2.0, 200.0)
        CGContextScaleCTM(context, 1.0, -1.0)

        let line = CTLineCreateWithAttributedString(attributed)
        CTLineDraw(line, context)
    }
}

class ViewController: UIViewController {
    override func loadView() {
        super.loadView()

        self.view = View()
    }
}
まとめ
このソースコードは汚い(私が修正した箇所。オリジナルのコードはとても綺麗です!)ですので、整理していきます!いつも汚いソースコードで失礼しておりますorz
↓こんな記事もありますよ!
 2021-05-14 14:21:41 | WatchOSのwatchconnectivityのFiletransferの落とし穴。と、避け方。
AppleWatch 実機だと成功するんだけど、シュミレーターだと失敗するという、、、
昔作成してた時は成功してたのになーと思って調べると、どうやら昔は成功してたみたい。watchOS6以降は... |
 2021-05-06 14:04:37 | LINEのアニメーションスタンプ制作の落とし穴、、、失敗談
ゴールデンウィークにLINEスタンプを作成してみました。
作り切って申請も通したんですが、意図したアニメーションと違う、、、、
LINEクリエーターの画面だと、アニメーションのプレビュー... |
 2021-05-01 18:05:35 | 久しぶりのAdmobをobjective-cに実装。コンパイルエラーだらけ。バーミッション不具合でエミュレータにインスコできない。
忘れないようにメモ
エミュレータにアプリをインストールする際にパーミッション系のエラーがでた時、また、iphone実機にインストールする際にも権限系のエラーが出る場合。
ターゲット→ex... |
|
Tweet
|
|||
| |||