HOME > UITableView
UITableView
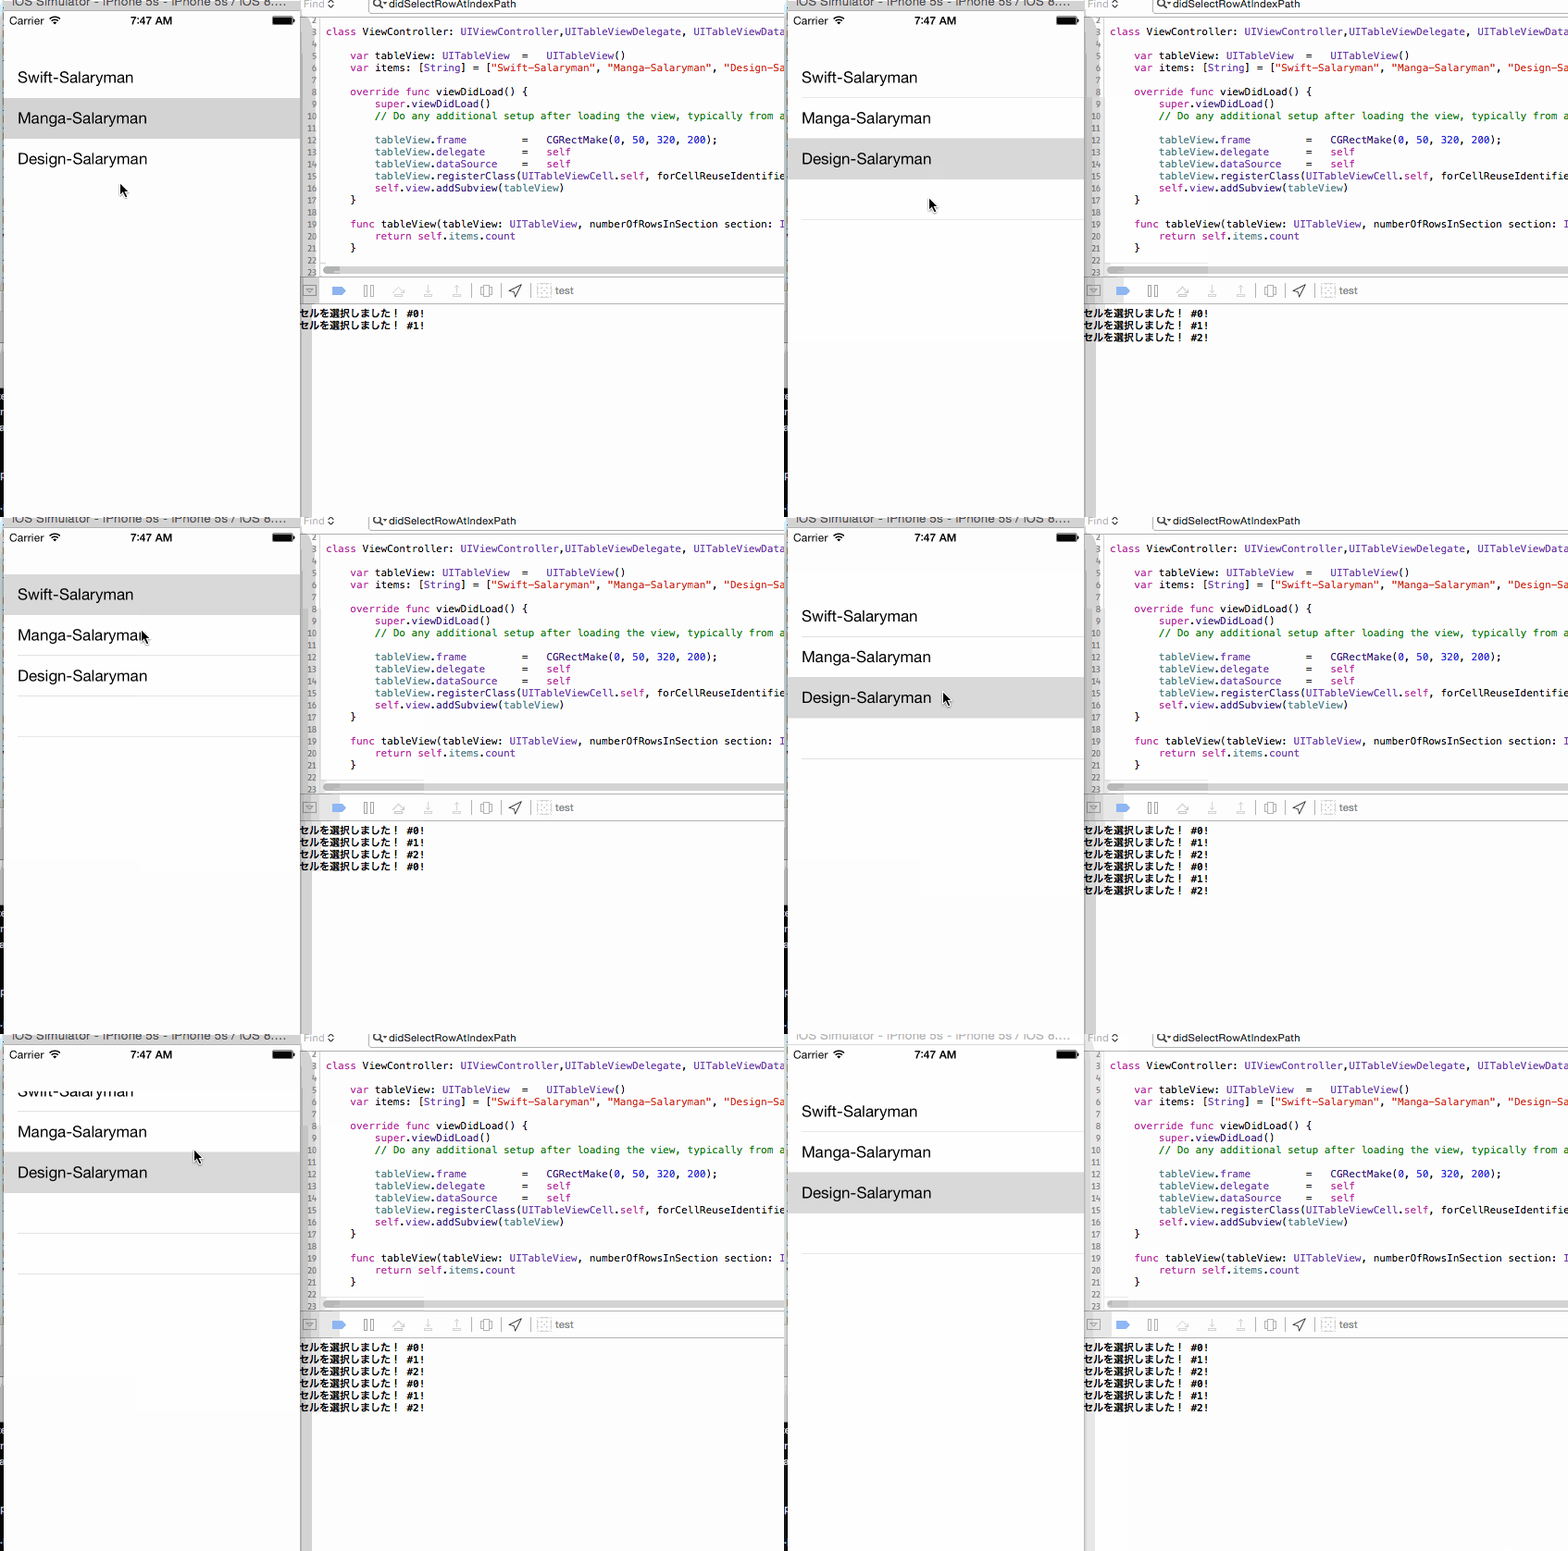
UITableViewはテーブル情報を表示するクラスです。リスト一覧を表示させる標準的な機能をStoryBoardを利用しないでコーディングだけで実装してみます。
UITableViewのクラス階層
NSObject
↑
UIResponder
↑
UIView
↑
UIScrollView
↑
UITableView
参考:
UIKit Framework Reference UITableView Class Reference
参考:How to make a simple tableview with iOS 8 and Swift
参考:Add UITableView programmatically in Swift
やってみた
TableViewはすこしややこしいですので、以下コードを全てViewController.swftにコピペして試すとわかりやすいかと思います。 まず完全なコードを貼り付けてから説明して参ります。太字の箇所が大切な行です。
import UIKit

class ViewController: UIViewController,UITableViewDelegate, UITableViewDataSource {

    //テーブルビューインスタンス作成
    var tableView: UITableView  =   UITableView()

    //テーブルに表示するセル配列
    var items: [String] = ["Swift-Salaryman", "Manga-Salaryman", "Design-Salaryman"]

    override func viewDidLoad() {
        super.viewDidLoad()
        // Do any additional setup after loading the view, typically from a nib.

        //テーブルビュー初期化、関連付け
        tableView.frame         =   CGRectMake(0, 50, 320, 200);
        tableView.delegate      =   self
        tableView.dataSource    =   self
        tableView.registerClass(UITableViewCell.self, forCellReuseIdentifier: "cell")
        self.view.addSubview(tableView)
    }

    func tableView(tableView: UITableView, numberOfRowsInSection section: Int) -> Int {
        return self.items.count
    }

    func tableView(tableView: UITableView, cellForRowAtIndexPath indexPath: NSIndexPath) -> UITableViewCell {
        var cell:UITableViewCell = tableView.dequeueReusableCellWithIdentifier("cell") as UITableViewCell
        cell.textLabel?.text = self.items[indexPath.row]
        return cell
    }

    func tableView(tableView: UITableView, didSelectRowAtIndexPath indexPath: NSIndexPath) {
        println("セルを選択しました! #\(indexPath.row)!")
    }

    override func didReceiveMemoryWarning() {
        super.didReceiveMemoryWarning()
        // Dispose of any resources that can be recreated.
    }
};
それぞれの説明
インスタンス作成
最初の太字の箇所です。var tableView: UITableView = UITableView()
ViewControllerの上にTableViewを追加する為にインスタンスを宣言します
表示するアイテムを作成する
var items: [String] = ["Swift-Salaryman", "Manga-Salaryman", "Design-Salaryman"]
これはなんでもOKです。リストに表示したい文字列をリストアップしてください。
初期化処理
上の例ではviewDidLoad時に実施しています。
tableView.frame = CGRectMake(0, 50, 320, 200);
サイズをセット。画面全体に表示するも一部に表示するもカスタマイズ可能です。
DelegateをUIViewControllerに関連付け
tableView.delegate = self
ちょっとわかりずらいdelegate。これはViewControllerに追加したインターフェースのプロトコルUITableViewDelegateと連携しています。
この行を追加する=UITableViewDelegateを追加する必要があるので注意してください。
DataSourceをUIViewControllerに関連付け
tableView.dataSource = self
こちらもdelegateと同様にUITableViewDataSourceと連携しているので注意です。delegateとdatasourceはUITableViewを利用するには
「必要なので追加」と丸暗記した方が混乱しないかもしれません。
CellをTableViewに登録
tableView.registerClass(UITableViewCell.self, forCellReuseIdentifier: "cell")
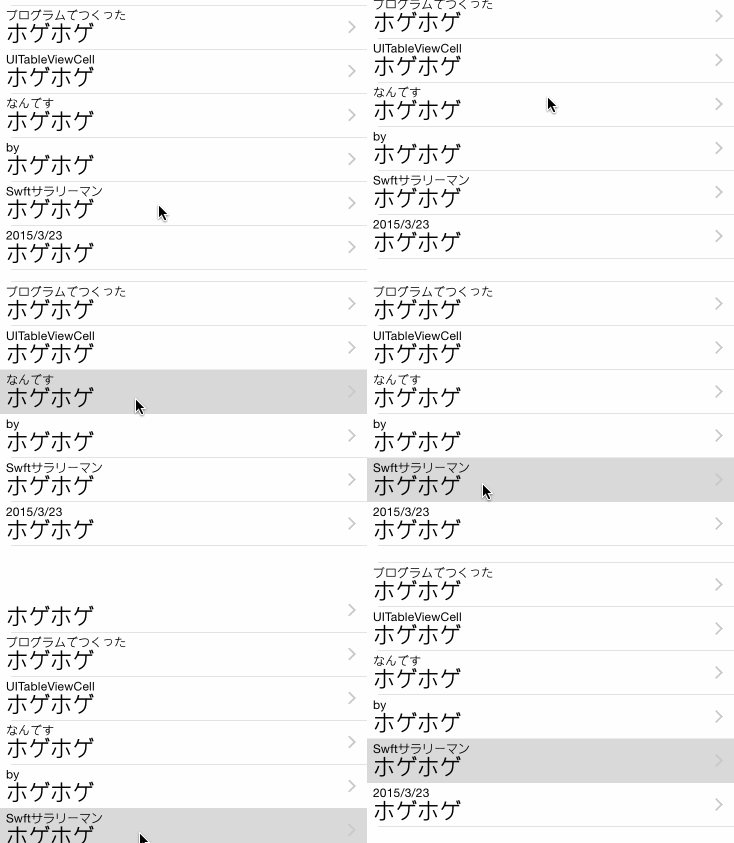
ここでセルをUITableViewに登録します。セルをカスタマイズしたい(画像をつけたり二行にしたり等)はこちらをカスタマイズします。
関数を追加
上記の設定の準備が整えば次はイベントを受け取る関数を追加していきます。この関数がない場合はエラーが発生します。 理由はUITableViewDataSourceのProtocolインターフェースが必須だよ〜と宣言しているからです。 興味のある方はクラスの中を覗いてみてください。以下一部参照。optionalがついていないものは必須。
protocol UITableViewDataSource : NSObjectProtocol {
    func tableView(tableView: UITableView, numberOfRowsInSection section: Int) -> Int
    func tableView(tableView: UITableView, cellForRowAtIndexPath indexPath: NSIndexPath) -> UITableViewCell
    optional func numberOfSectionsInTableView(tableView: UITableView) -> Int // Default is 1 if not implemented
    ...
}
上記よりnumberOfRowsInSection、cellForRowAtIndexPath
は必須ですので追加しましょう。あとはTableViewをクリックした時にイベントを取得する為にdidSelectRowAtIndexPathを追加して完了。こちらもUITableViewDelegateの中身をみてみると勉強になりますよ!
Protocolが良くわからない場合は、過去記事(Protocol)を是非ご一読くださいませ。
↓こんな記事もありますよ!
 2021-05-14 14:21:41 | WatchOSのwatchconnectivityのFiletransferの落とし穴。と、避け方。
AppleWatch 実機だと成功するんだけど、シュミレーターだと失敗するという、、、
昔作成してた時は成功してたのになーと思って調べると、どうやら昔は成功してたみたい。watchOS6以降は... |
 2021-05-06 14:04:37 | LINEのアニメーションスタンプ制作の落とし穴、、、失敗談
ゴールデンウィークにLINEスタンプを作成してみました。
作り切って申請も通したんですが、意図したアニメーションと違う、、、、
LINEクリエーターの画面だと、アニメーションのプレビュー... |
 2021-05-01 18:05:35 | 久しぶりのAdmobをobjective-cに実装。コンパイルエラーだらけ。バーミッション不具合でエミュレータにインスコできない。
忘れないようにメモ
エミュレータにアプリをインストールする際にパーミッション系のエラーがでた時、また、iphone実機にインストールする際にも権限系のエラーが出る場合。
ターゲット→ex... |
|
Tweet
|
|||
| |||




 Facebook#1(調査)


